
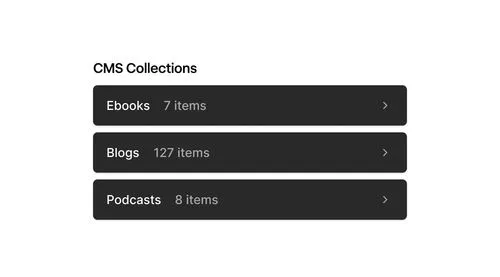


Key CMS use cases
Webflow’s CMS Collections enable you to scalably manage structured content such as blogs, articles, recipes, real estate listings, team directories, branch locations, and much more.
When using a CMS Collection and items, you can manage your content in a single source and reuse across your site — this ensures that each reference of that CMS content is kept in sync and only needs to be updated once.
If you are migrating your CMS content from another platform, you can easily create a Collection that maps to how your content lives in your current CMS. With Webflow’s CSV import feature or Data APIs, you can easily import your content to get up and running fast.
If your content is being connected to a third party content source that will be regularly updated, you can create a Collection and use Webflow’s Data APIs to ensure your Collection automatically stays in sync with your origin source without needing to manually copy and paste. Webflow’s API is supported by a wide range of automation platforms and powerful third party synchronization services.
A powerful new addition is Webflow’s CMS item publishing, where each item automatically saves changes and can be individually published when you are ready, without needing to publish your entire website.
When using a CMS Collection and items, you can manage your content in a single source and reuse across your site — this ensures that each reference of that CMS content is kept in sync and only needs to be updated once. When you have content that is going to have multiple pages of that type (e.g., resources, jobs, blogs, events, locations) creating a Collection will automatically generate a template page, which will serve as the template for every item in the Collection.
Dynamic CMS content vs. static content

When building your site on Webflow, there are two categories of content that your site may need: dynamic content and static content. Both can contain text, images, videos, and much more, but there are key differences to how you set them up and manage them.
Dynamic CMS content
Dynamic CMS content describes content (Collection items) that is stored in your Webflow CMS Collections and connected to elements in your Collection lists and Collection pages. CMS content is always structured, and items can be individually updated — manually or with automations. It is best used for sites that have similar repeating content, like blog posts, product pages, or customer testimonials.
Static content
Static content describes content that is directly part of your site’s page. It’s best used for your unstructured, free-form content that will likely only exist once on your site, like your About page, Contact page, or a campaign landing page.
When to use a CMS Collection vs. create static content
Most pages on your site will typically contain a mix of static and dynamic CMS content. For example, your homepage may contain information about your business and also a list of your recent blog articles or best-selling products. Because your blog articles or products are structured and dynamic forms of content, they would be most easily managed in the CMS vs. as static content.
Use when...
Example use cases
- The content follows a repeatable structure.
- The content will be reused across different pages and components, especially in varying subsets, sorting orders, and different presentations.
- The content is highly dynamic and is updated on a more frequent cadence.
- You have lists of similar content that need dynamic filtering and sorting, with newly-published items added automatically.
- You need item-specific publishing controls, such as writing or updating an article over a period of time before you publish it.
- Blog posts
- Press releases
- Products
- Customer testimonials
- Real estate property listings
- Franchise locations
- Staff directory
- A video catalog
- Courses and lessons
- FAQs
- The content is unique and is needed for a one-off instance that generally won’t be reused across pages.
- You don’t need to template it and it doesn’t require the same structure.
- The content doesn’t change frequently.
- About Us page
- Company mission
- Privacy policy
- Terms of use
- 404 page
- Company history
- Contact us page
- A single video
- A single team photo
Structuring your CMS Collections

Identify and analyze your existing content types and schema
Content types
Identify the different content types that you want to include in your site (e.g., articles, blogs, categories, products, authors, FAQs.)
Fields and attributes
Document the fields and attributes for each content type, such as titles, descriptions, images, metadata, and tags.
Relationships
Note the relationships between content types (e.g., author to article, category to post).
- Before migrating your content, carefully consider the relationships between different content types. This will then help you determine if you should include Reference and Multi-Reference fields in your Collection schema and the optimal migration order.
- Example: Let’s say you will have an Articles Collection and for each article, you want to include relevant category tags. You can create a Categories Collection that is then a multi-reference field in the Articles collection.

As you think about the content you want to bring into Webflow, note if there are any types of content that have a repeatable structure — both in terms of content and visual design. This is typically a good signal that it would benefit from being stored and managed in your CMS.
Define the new schema in Webflow
New CMS structure
Familiarize yourself with Webflow’s CMS field types as you will use these to define and design your CMS Collections structures.
Collection URL
When creating your Collection, you can choose a Collection URL, which is the slug for the folder that holds your Collection pages (i.e. the pages generated for each item in your Collection).
Webflow automatically generates a Collection URL that matches the Collection name, but you can customize the Collection URL at any time.
Webflow uses structured paths for Collection page content. For example, you might choose to give your Blog Collection the slug blogs, which would give each of your article paths a structure like /blogs/10-things-to-see-in-chicago, and /blogs/why-webflow-is-so-awesome.
The Collection slug is an integral part of the Collection page path, and cannot be removed. It can however be changed at any time you like, and it can be placed with a folder to create paths like /restaurants/chicago/giordanos. In this example, restaurants is a folder slug. chicago is a Collection slug, and giordanos is a CMS item slug.
Equivalent types and fields
Identify the CMS field types you want to use that are best for your content. Webflow allows you to create and delete Collection fields at any time. However, once created, you cannot change a field’s type. So, for example, you cannot update an existing plain text field to a rich text field.
To save yourself re-entry in a new field, make sure to consider your field types carefully and to test them with a few rows of sample content before you begin loading all of your data.
New fields
Determine if there are any new fields required by Webflow that didn’t exist in your old CMS.
When creating a schema, pressure test the fields you’ve created through various types of content you might expect to ensure you have all fields and options in place for end content creators. This will help you determine when to use a plain text field vs. a rich text field, or an option field vs. a multi-ref field to most effectively store and manage your content.

Typeform's beautiful blog, built on the Webflow CMS, is made up of almost 400 articles.
Familiarize yourself with Webflow’s CMS import options
Whether you are migrating content for the first time or need to consistently import data into Webflow’s CMS, there are several ways to create and import data into Webflow.
It's best to manually author and edit CMS items natively in Webflow when:
- You’re working with small amounts of content and need to quickly create or update CMS items.
- You want to preview and polish the content directly in Webflow.
- Designers or marketers that need to manually curate or tweak specific entries.
When you have a large batch of structured data to import all at once or are migrating content, you can speed up the process by importing CMS items via a CSV file.
Webflow supports CSV import and export for all of its field types, including images, videos, multi-ref fields, and multi-image fields. To ensure you are formatting your CSV import file properly, you can create a few records in your Webflow CMS Collection and then export that Collection to see the CSV it generates. Use this as a guide to structuring your import CSV file correctly.
Importing images
To import images they must be hosted publicly on the Internet. To import the image, you will need to specify the image’s public URL in the CSV. Webflow will then download and store the image in Webflow’s content-delivery network (CDN) for efficient access. In a multi-image field, the images’ URLs must be separated by semicolons in the CSV. Note that Webflow supports JPEG, GIF, PNG, WebP and AVIF images up to 4MB
Importing videos
To import videos into a CMS video field, they must be hosted with an Embedly-compatible hosting provider. To import the video, you will specify the video’s public URL in the CSV file. Webflow video fields can support any URL format that is supported by Embedly, including YouTube, Vimeo, Loom, and many more.
Use Webflow CMS APIs to programmatically create, update, and delete CMS items and keep it in sync between Webflow's CMS and an external data source. Best to use when:
- Initially migrating large volumes of data into Webflow’s CMS and ongoing content creation or update automation workflows.
- You need to update from your origin source to be in sync with Webflow’s CMS so designers and content authors have the most up-to-date content to design and build with.
Use third party apps and tools, like Zapier or Whalesync, to easily connect and import data from an external data source into Webflow CMS. Best to use when:
- You have external data that needs to be replicated in Webflow’s CMS and need to set up an integration in a low-code/no-code way.
- Initially importing data into Webflow’s CMS and ongoing content creation or update automation workflows.
- You need to update from your origin source to be in sync with Webflow’s CMS so designers and content authors have the most up-to-date content to design and build with.
Use Webflow’s MCP (Model Context Protocol) server which allows you to create and update your CMS content directly from an MCP-compatible large language model (LLM) and Data APIs.
This structured content can then be ingested directly into the CMS from external systems. It supports programmatic control, schema validation, and secure syncing of content at scale. Best to use when:
- You need a scalable, secure, and automated pipeline to sync high volumes of structured content into Webflow’s CMS.
- You’re migrating content from an external source and want more control over validation, structure, and transformation logic before publishing.
- Ideal for engineering or content platform teams looking to centralize and operationalize content delivery into Webflow via robust, API-first tooling.
Create a mapping plan
Field mapping
Map each field of your data source to the corresponding field in Webflow. This includes renaming fields, converting data formats, and merging or splitting fields if necessary. For example, if you are migrating content from a legacy tool to Webflow’s CMS:
- Old CMS: title → Webflow CMS: name
- Old CMS: content → Webflow CMS: body
- Old CMS: tags (comma separated) → Webflow CMS: tags (array)
Content type mapping
Align the content types from the old CMS with your CMS Collections in Webflow. For example, if you are migrating content from a legacy tool to Webflow’s CMS:
- Old CMS: blog_post → New CMS: article
- Old CMS: news_item → New CMS: news
Transform data
For a seamless content import, you’ll want to ensure your data is clean, structured, and ready for use. Ahead of your import, you may need to do the following:
Clean up the data if necessary. Remove obsolete entries, fix broken links, and ensure data consistency.
Write scripts or use migration tools to transform the data from the old format to the new format.
If your original data sources are divided into different table structures than your Webflow CMS, you will need to restructure your data so that you can create one CSV file per Collection.
If you have images, these will need to be expressed as publicly-accessible URLs in your CSV or API calls for the import.
- Make certain your images are JPEG, GIF, PNG, WebP or AVIF format, and no larger than 4MB in size.
- Optimize and resize your images before loading for best results.
- Avoid using excessively long, complex file names in your URLs as this may create problems for the importer.
If you have videos, these will need to be hosted on a video hosting service like YouTube, Vimeo, Wistia, Bunny Stream, Loom, or any other Embedly-supported provider. You will need to upload the videos first, and then use the public video URL in your import CSV or API calls.
Migrate and import data into Webflow’s CMS
If you are migrating data from a legacy platform or importing data from an external database, you can use Webflow’s CSV upload, APIs, or MCP Server to import data into Webflow’s CMS.
Testing and validation
Content review
Manually review a sample of the migrated content to ensure it appears correctly in Webflow.
Functionality testing
Test the functionality of Webflow with your migrated content, including searching, filtering, and displaying content.
Code embeds
If you are importing content that has code embeds in rich text fields, it is highly recommended that you QA these items to ensure that any custom code has not been sanitized.
In general you can achieve best results when your code embed blocks are wrapped with the following DIV structure:
<div data-rt-embed-type='true'>
  your scripts or CSS style blocks here
</div>
Collection fields and use cases
Default Collection fields
By default, every Collection includes some standard fields for Collection items:
Name
There is a 256 character limit for an item name.
name
slug
lastPublished
createdOn
Notes:
- Last published date, last updated date, and created date fields are not editable and are based on when these actions occurred in Webflow.
- When migrating content, if it is important to keep the original date from your previous platform, we recommend creating a custom field to support historical dates.
Custom Fields
Custom fields allow you to build and structure your Collection based on your data’s schema. Webflow supports a range of out-of-the-box Collection fields.
The plain text field adds unformatted text that doesn’t need special formatting like headings, inline styles, or inline media like images or videos. Common use cases include:
- Short-form text that doesn’t need any formatting
- Names and titles
- Product descriptions
- SEO metadata (optimized titles and descriptions)
Plain text fields are great when you want to limit the amount of formatting collaborators can do.
- You can set conditional visibility to show or hide individual elements in a Collection list or on a Collection page using the plain text field.
- You can set a minimum character count (with spaces) and maximum character count (with spaces).
- Plain text fields support both single-line and multi-line as a convenience for entry. However in rich text mode, line breaks are not preserved. If you need line breaks, we recommend using the rich text field instead.
- Note: There is a max 1MB for text fields.
Rich text fields are text with formatting options. They allow you to add styling like headings, paragraphs, ordered and unordered lists, images, videos, and media directly to the field. Common use cases include:
- Long-form content like blog posts that need formatting and content mixed together.
- Unstyled text content that requires line breaks or paragraphs.
Best practices and considerations:
- You can use conditional visibility to show rich text content under specific conditions. For example, you can show a heading only when a specific rich text field contains content.
- You can add custom embeds using a rich text field and the embed element.
- You can set a minimum character count (with spaces) and maximum character count (with spaces).
- Ensure you are structuring your rich text content to follow HTML5 semantic markup best practices. This ensures your content is both optimized for SEO and accessibility.
- Note: There is a max 1MB for text fields.
Advanced use cases
The CMS does not currently have a "raw embed" field type. Use a rich text field containing a custom embed element for your raw-data needs:
- Storing article-specific or product-specific JSON-LD
- Storing third party embeds, like SoundCloud podcasts or Calendly embeds
- Storing inline SVGs that need to support brand coloring
- This is also relevant to component properties since you often need to specify (e.g., an inline SVG) but this is not directly supported.
The image field allows you to upload an image for your Collection items and use it in your designs. Common use cases include:
- Profile picture for authors or team members
- Icons
- Background images for sections
- Image for Open Graph
Best practices and considerations:
- Ahead of uploading your images to your CMS items, make sure they are prepped and edited.
- To optimize performance, we recommend compressing your images and sizing them before uploading them to the CMS items.
- For images that you’ve already uploaded to items that you want to compress, you can use Webflow’s built-in compression tool that will compress all images into AVIF or WebP file types.
- For image fields you can set a minimum and maximum size, width, and height requirement that uploaded images need to meet.
- If a CMS image will be displayed on a page, set a maximum file size to ensure collaborators upload images that are optimized for page performance.
- Ensure that photo captured images are properly oriented before upload.
- Set alt text for images by creating a dedicated text field for your Collection.
Limitations and considerations
- The maximum file size for each image is 4MB.
- When you upload an image, EXIF data will be stripped including copyright and image orientation.
- Hosted images are on a publicly accessible CDN and any hosted image downloads will count towards your site’s bandwidth, so we recommend ensuring they are optimized.
- For externally-hosted images, such as direct links to a YouTube video thumbnail, use the URL field paired with custom elements to create your <img> element vs. an image field.
The multi-image field allows you to upload multiple images for your Collection item. Common use cases include:
- Photo galleries
- Product thumbnails
- Dynamic lightboxes
Best practices and considerations:
- For images that will be displayed on pages, make sure you define unique alt text for each image to meet accessibility and SEO standards.
- Include a plain text field that can be specifically used for image alt text. For more information, see this guide.
- To optimize performance, we recommend compressing your images and sizing them before uploading them to the CMS items.
- For images that you’ve already uploaded to items that you want to compress, you can use Webflow’s built-in compression tool that will compress all images into AVIF or WebP file types.
The video field accepts a URL for videos hosted on popular video hosting platforms, like YouTube or Vimeo. In combination with the video element, you can embed and dynamically display a video in the context of your CMS item. Common use cases include:
- Video to accompany course content
- Interview video to accompany news article
- X/Twitter posts to accompany blog content
Best practices and considerations:
- Webflow does not currently support video files directly. Instead, you’ll need to use platforms like YouTube, Vimeo, or Wistia.
- The video player is determined by the platform you are using, and in some cases is not brandable or customizable.
- For more hosting and player controls, you may want to look at hosting providers (e.g., VidzFlow, Flowdrive, and Bunny Stream which are compatible.
- When using videos on your pages, consider optimizing videos by choosing the appropriate video file format and compression settings for your needs to avoid introducing performance issues for your sites.
- Choose the video format based on compatibility and efficiency. For example, WebM is generally good for web use with smaller file sizes at comparable quality with other formats; however, MP4 tends to have higher video quality and greater cross-browser compatibility, but a larger file size when compared to WebM.
- Consider audio optimization as part of your video file compression efforts, like removing audio data from muted videos to reduce file size.
- Although Webflow natively supports video through background video and video embed elements, in some cases it’s better for performance to embed your videos as custom code or using a custom element.
- This field can also support other media types and third party media providers as well like:
- Image: Instagram, Dribble, Imgur, and many more
- Rich media: Scribd, Prezy, SlideShare, and more
- Social media: TikTok, X/Twitter posts
The link field allows you to dynamically add links to your designs. Link fields are typically connected to text links or buttons and can be used to filter Collection lists or show specific elements using conditional visibility in Collection lists or on Collection pages. Common use cases include:
- You can connect link fields to text elements in Collection lists or on Collection pages to dynamically display the URL as text.
- You can set conditional visibility to show or hide individual elements in a Collection list or on a Collection page using the link field. For example, if you have a collection of people where only some have portfolio links, you can conditionally display the link only when a portfolio URL is set.
The email field allows you to specify an email address for a Collection item. It can be used as a link so visitors can send an email with a click or tap. Common use cases include:
- Email addresses of a team member or customer service department
- Link to email addresses on a website
- Best practices and considerations:
When a link is connected to the dynamic email field, any email address in the email field in the link settings will be overwritten by the dynamic email address specified for Collection items.
The number field allows you to input a numeric value so you can display numbers and decimals in your Collection items. Common use cases include:
- Ratings
- Rankings
- Custom sort order
- Pricing
Best practices and considerations:
- The number field can be connected to any text element to dynamically populate numeric data from Collection items.
- You can use the number field to filter or sort a Collection list or set conditional visibility on elements in Collection lists and pages.
- For number fields, you can set a minimum number and maximum number that can be input and if negative numbers are allowed.
- You can filter your Collection list using the number field to show items in a list based on your filter rule. Example: If you only want to show items in a Collection list that have for example a rating of four or higher, you can use filters to filter your Collection list using a number field.
- There is a maximum of 16 digits per number field.
The date/time field is a Collection field that lets you and your collaborators specify a date and time for a Collection item. The values specified for the date and time field can be displayed in Collection lists or on Collection pages. Common use cases include:
- A date or time in the future (upcoming event, release date, etc.)
- A date or time in the past (birthday, historical date, etc.)
- Manually setting custom publication dates
Best practices and considerations:
- Use a date field to show original date creation. If you plan to use or display your migrated content’s original creation or last published dates, create custom date fields to store those historical values.
- You can also use the date and time field to filter and sort a Collection list or to set conditional visibility on elements in Collection lists and pages.
A switch is a field type which can have either of two values: yes or no. Common use cases include:
- Want to display only non-profits? Create a “Non-profit?” switch.
- Want to display featured articles? Create a “Featured?” switch.
- Want to hide specific items until they are ready to be displayed on your site? Create a “Hidden?” switch.
- Want to show an “On Sale” label only for selected items? Create an “Is on sale?” switch.
Best practices and considerations:
- The switch field is a Collection field that is primarily used as a filtering tool.
- The default value for a switch is “No.” So, when you create a switch, consider labeling it with a question that will in most cases have “No” as an answer.
The color field allows you to add a unique color which can then be applied as a text color, background color, or border on your site. Common use cases include:
- Style category Collections, like blog post categories, so each category is represented with a unique color
- Highlight labels with different background colors for each label
- Alternate text colors for tags
- Alternate border colors to highlight items from the same category
Advanced use cases
- The color field supports entry using a wide range of CSS-compatible formats including;
- Named colors (e.g., red)
- HEX RGB 6-digit (e.g., #ff0000) and 3-digit shorthand (e.g., #00e)
- HEX RGBA 8-digit (e.g., #ff000066) and 4-digit shorthand (e.g., #f006)
- CSS function formats such as rgb(), rgba() with alpha transparency, hsv() and hsva() (e.g., hsla(330, 100%, 50%, 0.5))
- These allow you to support alpha transparency in your CMS-stored colors as well.
- All of these formats are fully supported by the Data API and CSV import.
Best practices and considerations:
When you set a color for a Collection item, you can pull that color into your design. Each element in your Collection list or Collection page will pull the color value specified for each Collection item.
The file field allows you to add popular file types to CMS items so that site visitors can download them with a click or tap. Common use cases include:
- Let your website owners upload PDFs (menus, schedules, location maps, and more)
- Reveal a downloadable brochure, whitepaper, case study, ebook, and more in the success state of your forms on a templated landing page
- Add a downloadable CV/resume link for each team member on your team page
- Provide downloadable graphics like wallpapers, infographics, and more in your blog posts
Best practices and considerations:
- Webflow can support the following file types:
- Image file types: PNG, JPEG/JPG, GIF, BMP, SVG, WebP
- Document file types: PDF, DOC/DOX, XLS/XLSX, PPT/PPTX, TXT, CSV, ODT, ODS, ODP
- The maximum file size is 4MB.
- All CMS-stored files are publicly accessible on Webflow’s high-performance CDN and may be picked up by search engines. Don’t use this to store confidential pricing PDFs or other information that you do not want to be publicly accessible.
The option field is a Collection field that gives CMS users a list of predefined values to choose from. Common use cases include:
- Predefined categories for a Collection
- Countries
- Languages
- Locations
- Departments
- Predefined sizes (such as for shirts, or artwork)
- Fixed numbers or number ranges
Best practices and considerations
- Use option fields for fixed, unchanging sets. Reminder: You can have up to 100 options per option field.
- Use consistent naming and casing across all the options in your field.
- Keep options short and to the point. Reminder: There is a 256 character limit per option.
- You can only have one option selected per option field.
- If each option needs its own content and metadata, consider creating a Collection and using a reference/multi-reference field instead.
- Be careful when renaming options later since they will affect all entries using them. Additionally, it may also impact any filters, styles or conditional visibility rules that you’ve set up.
A reference field allows you to add a single item from another Collection to reference it in the context of your Collection item. Common use cases include:
- “Blog posts” Collection referencing an “Authors” Collection
- "Recipes" Collection referencing an "Authors" Collection
- "News articles" Collection referencing a "Category" Collection
- "Lessons" Collection referencing a "Courses" Collection
Best practices and considerations
- Use reference fields for reusable and relational content.
- Name references clearly.
- Make sure that you’ve set up the referenced Collection first.
A multi-reference field allows you to add multiple items from another Collection to reference it in the context of your Collection items. Common use cases include:
- “Movies” Collection referencing multiple actors from an “Actors” Collection
- “Projects” Collection referencing multiple tags in a “Tags Collection”
Best practices and considerations
- Use reference fields for reusable and relational content.
- Make sure that you’ve set-up the referenced Collection first.
Option field vs. reference and multi-reference fields
Both option fields and reference/multi-reference fields allow your content editors and authors to select values. However, there are times when it may be best to use one field type over the other.
Type
Use when...
Example use case
Option field
- You have a limited, static set of values.
- The options are not shared across Collections.
- The values will not change frequently.
- You’re okay with having the values “hardcoded” into the Collection schema.
- Blog Post Category: “News,” “Tutorial,” “Case Study” (if you don't need a full category page)
- Project Status: “In Progress,” “Complete,” “Archived”
- Product Size: “S,” “M,” “L,” “XL”
Reference and multi-reference field
- You need to link another Collection’s items.
- You want to pull in dynamic metadata from another Collection.
- You need to build relationships between Collections.
- Blog Post → Reference to an “Author” Collection
- Product → Reference to a “Brand” Collection
- Article → Multi-reference to a “Tags” Collection
- Event → Multi-reference to “Speakers” or “Sponsors”
Key considerations:
- Collaborators cannot add new option values to an option field. They can only select option values predefined by the designer. If you want collaborators to add more options, like new categories, you should use a reference field instead.
- The values in an option field are only connected to the current Collection. They cannot be used or referenced in other Collections. If you need values that are reusable in different Collections, use a reference or multi-reference field instead.
- You cannot make multiple selections from an option field dropdown. For such cases, use a multi-reference field instead.
- You can't associate more information (such as a color) with an option. If you want to associate more information with each option, you need to use a reference field instead. The reference field allows you to access all the fields from that referenced Collection, so it’s much more flexible.
Best practices and considerations
Building and structuring Collection and fields
- Establish a naming system for your Collections and fields from the start. For example, if you have multiple Collections that will need an image field and caption, name those fields consistently.
- Use clear, descriptive names and helper text for your fields so that your team knows what a field is used for.
- If there are custom fields that are required, make sure you set it as a required field by selecting the “This field is required” when building your Collection.
- For fields that have very specific data or design needs, you can set specific requirements and validations. For example:
- For rich text and plain text fields, set a minimum character count (with spaces) and maximum character count (with spaces).
- For image fields, set a minimum and maximum size, width, and height requirement that uploaded images need to meet.
- For number fields, set a minimum number and maximum number that can be input and if negative numbers are allowed.
- If you have repeated sets of options, like a content type or product category, consider using a reference Collection or option field to reduce redundancy.
- Consider your Collection page template design during your Collection planning and design process. Consider which fields you may want to filter by and if you will need to account for fields so that you can leverage conditional visibility.
- If you have a Collection that is connected to a third party tool, like an external database or third party app, consider adding helper text for fields to signal to your content editors that they should not manually update these fields.
Overall managing CMS Collections and items
- Conduct regular content audits to determine if there’s any fields that aren’t being used or content that can be archived or deleted.
- Approach changes to your Collection schema with caution, especially if you’ve set up any integrations using third party apps or Webflow’s APIs. Any updates to your CMS Collection and its field can have downstream impacts to your integrations. The worst-case scenario is that it may break your integrations.
- Export CMS Collection content to create backups. Webflow automatically creates backups of your site’s design, but it’s also a good idea to backup your CMS content periodically. You can export Collections into a CSV file using the CSV export feature found in the CMS. We recommend doing this ahead of making bulk updates to your CMS items or importing a significant number of items.
Next up: Collection Templates
Collection items pages are the pages that display your Collection items.
More ways to level up

 Help Center
Find solutions to your Webflow questions and get help from our expert customer support team.
Go to docs Community
Connect with other designers and developers to share tips, ask questions, and show off your work.
Go to forum